2.2 Bed Assembly
Overview
BOM
| Material | Quantity | Notes |
|---|---|---|
| M3 8mm | 16 | - |
| M4 8mm | 16 | - |
| M3 nut | 4 | - |
| M3 50mm (countersunk) | 4 | Countersunk for the bed |
| LMK10LUU | 4 | If you want to use the bought version |
| LM10LUU | 4 | Use this from the old bed and print holders |
| Oldham coupler | 2 | Optional but highly advised |
| Leadscrew nut | 2 | - |
| Springs / Silicon dumper | 4 | - |
STL’s
| File name | Amount to print | |
|---|---|---|
| Oldham couplers ( optional ) | 2 | - |
| LM10LUU adapter | 4 | Only if you don’t use the bought version |
| Bed level knobs | 4 | - |
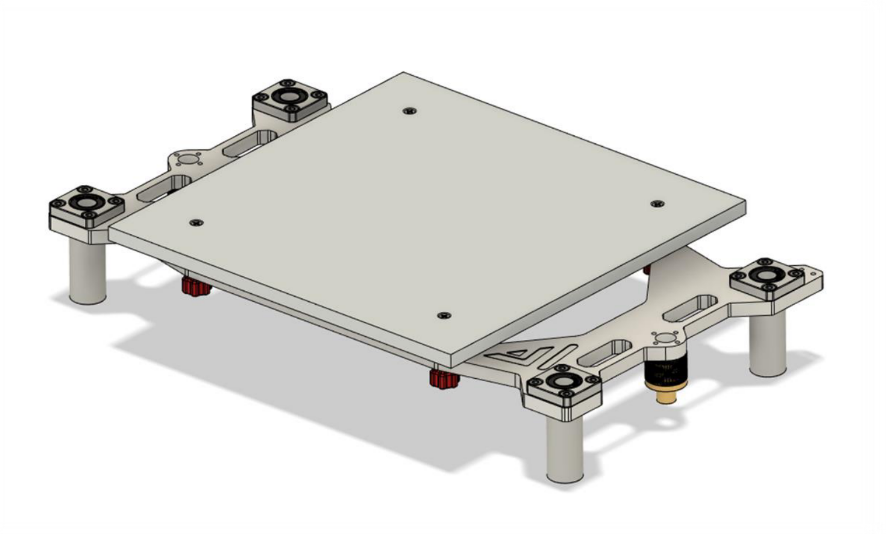
Step 1
Mount the LMK10LUU using the M4 10mm hardware to the bed frame. Then mount the Oldham couplers with the leadscrew nuts together with M3 10mm and the M3 nut and mount that assembly to the bed frame using M3 hardware.
Afterwards place the bed assembly in the rods and the leadscrew.
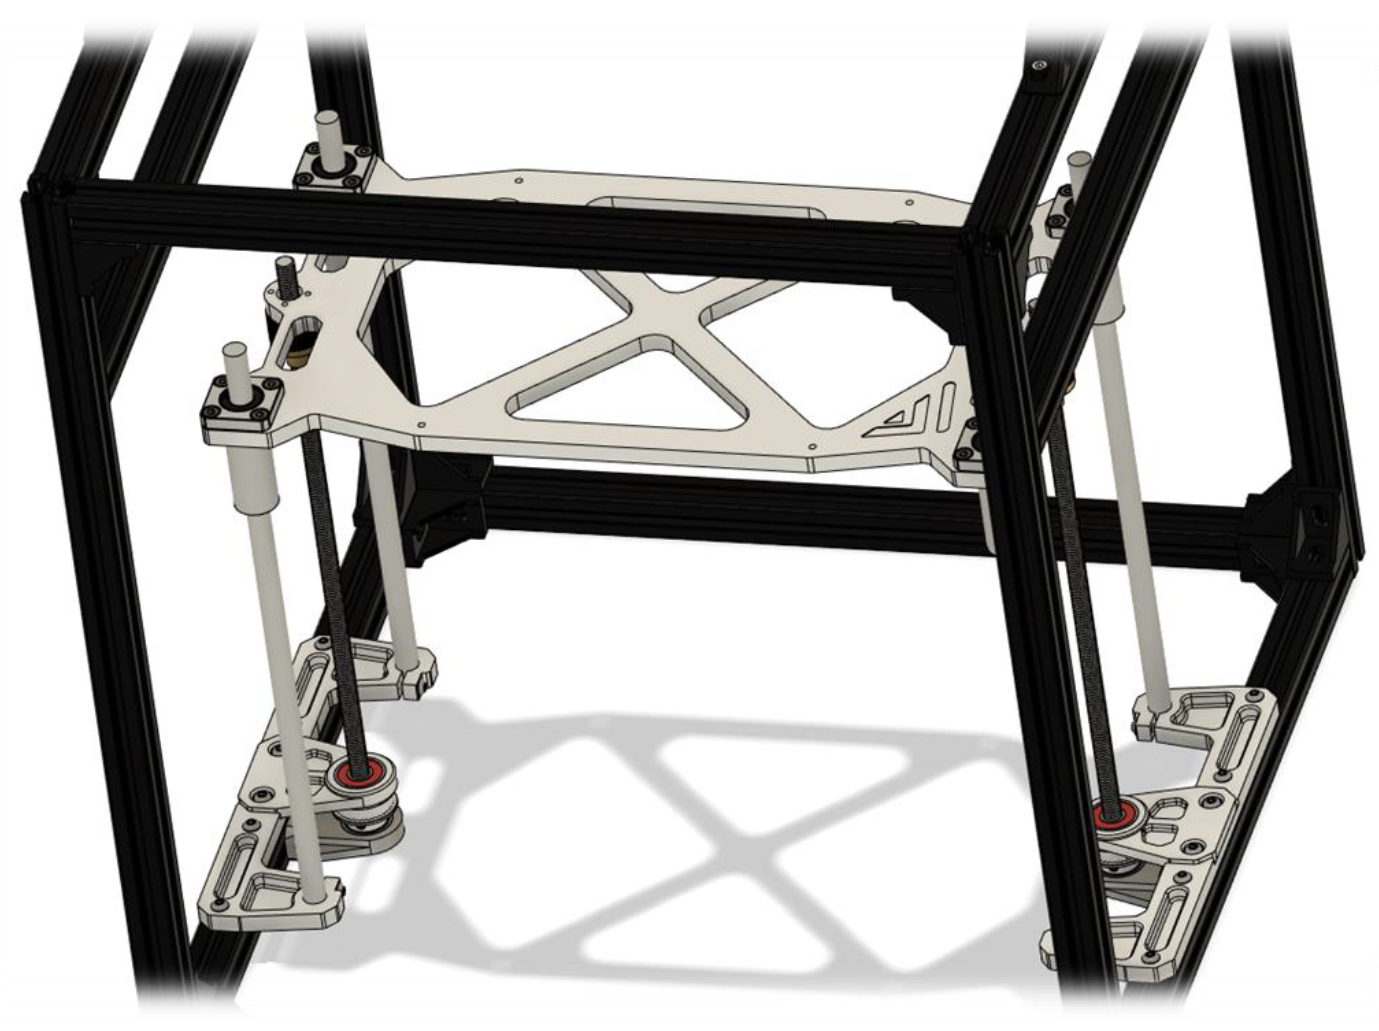
Step 2
Place the bed assembly in the rods and leadscre
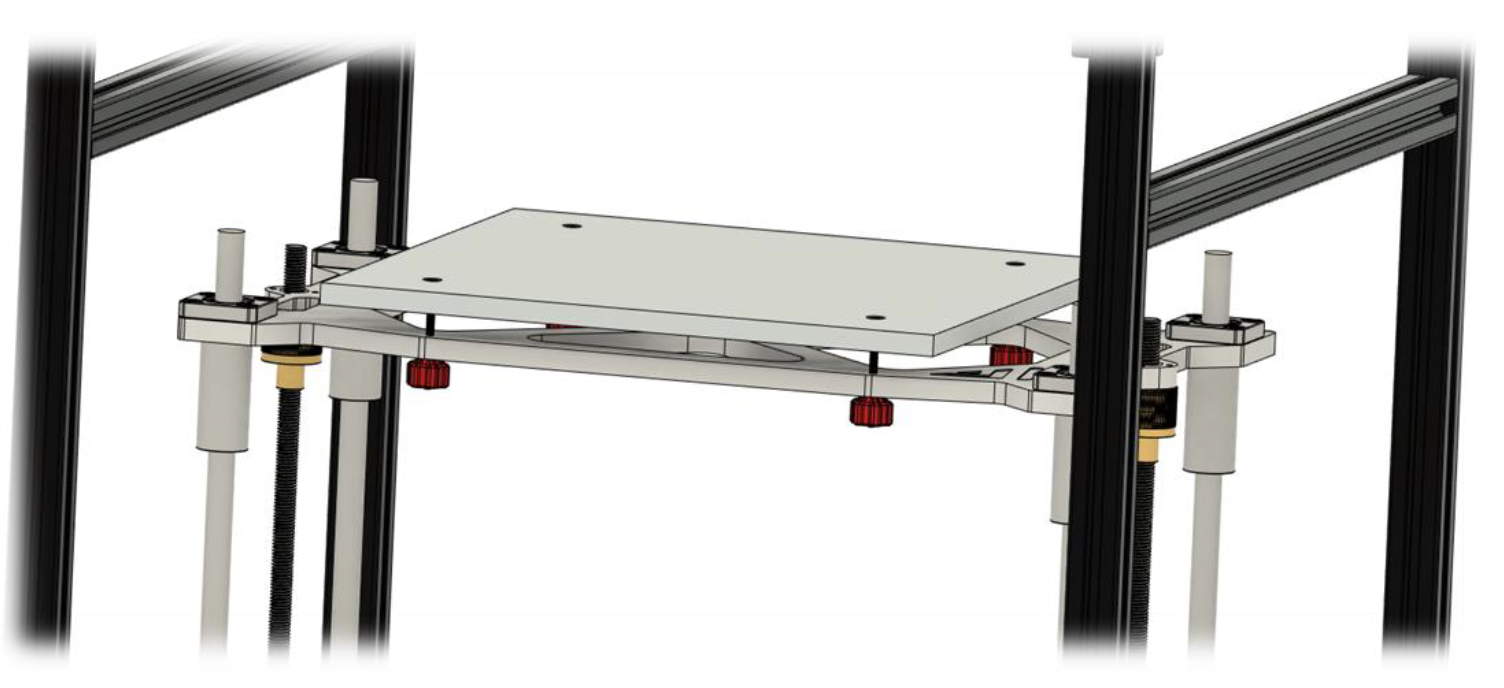
Step 3
Mount the bed plate to the bed frame using the 50mm countersunk M3 screws, put a Spring or a silicon dumper on each corner of the bed before attaching the screw and the bed level knob to it. Then give every knob a small “torque” so you can later level your bed propperly. When using a cast aluminum bed make sure it is well prepped before mounting. It is recommended to always be safe and inform yourself properly on how to apply a AC silicon heating pad.