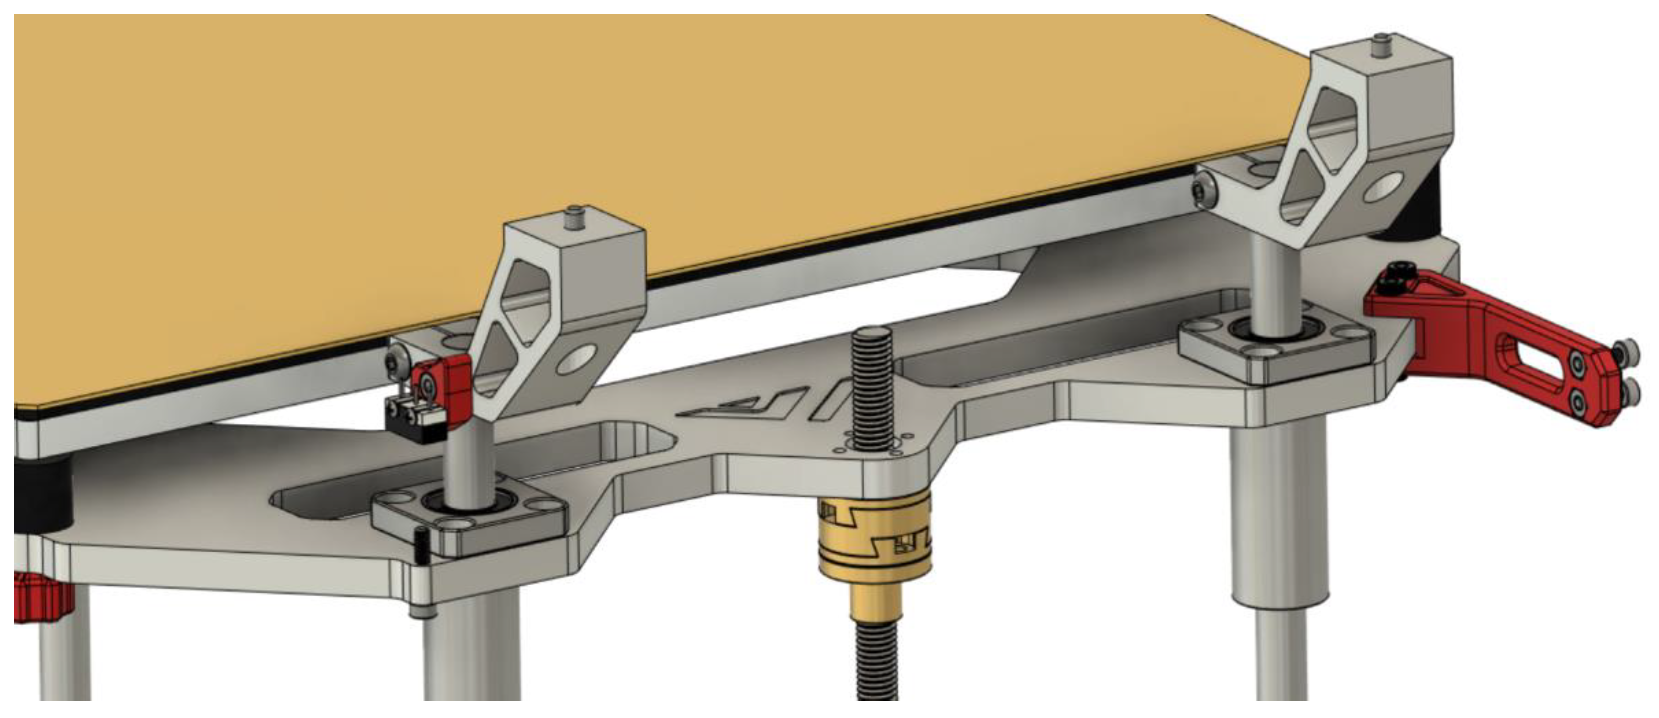
3.5 Z-Switch & bed chain
 |
Parts
| Part | Location | Info |
|---|---|---|
| M2 x 10mm Quantity: 2 |
Layer: 3 Box: VZ330 Box 6 |
|
| M3 x 6mm Quantity: 2 |
Layer: 3 Box: VZ330 Box 6 |
|
| M3 x 8mm Quantity: 4 |
Layer: 3 Box: VZ330 Box 6 |
|
| M3 x 10mm Quantity: 1 |
Layer: 3 Box: VZ330 Box 6 |
|
| M3 x 45mm Quantity: 1 |
Layer: 3 Box: VZ330 Box 6 |
|
| M3 nut Quantity: 1 |
Layer: 3 Box: VZ330 Box 6 |
|
| M3 t-nut Quantity: 2 |
Layer: 3 Box: VZ330 Box 6 |
|
| Microswitch Quantity: 1 |
Layer: 2 Box: VZ330 Box 2 |
 |
| Endstop holder Quantity: 1 |
Layer: 2 Box: VZ330 Box 2 |
 |
| Z-chain holder Quantity: 1 |
Layer: 2 Box: VZ330 Box 2 |
 |
Step 1
Notes
Required
• Box 6 - M3 x 10mm
• Box 2
 |
| Part | Location |
|---|---|
| M3 x 10mm Quantity: 1 |
Layer: 3 Box: VZ330 Box 6 Bag: M3 Bagnumber: 4/16 |
| Endstop holder Quantitiy: 1 |
Layer: 2 Box: VZ330 Box 2 |
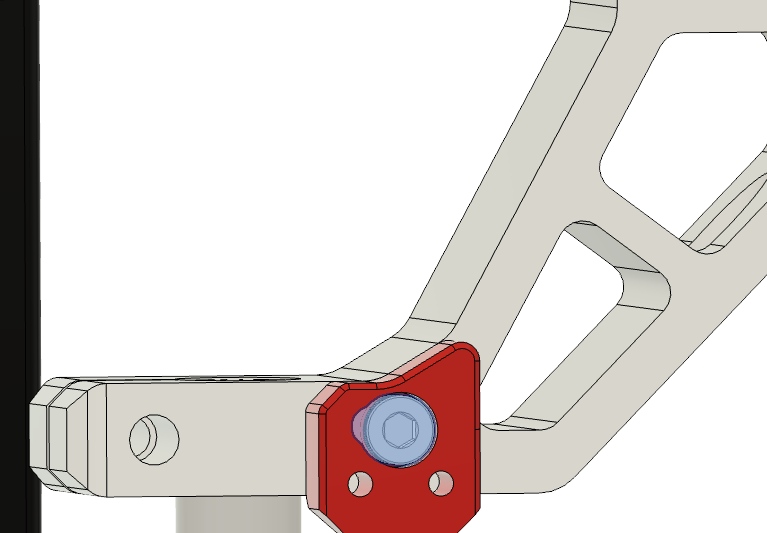 |
• Screw in the endstop holder with the M3 x 10mm screw to the top front z rod holder. |
Step 2
Required
• Box 6 - M2 x 10mm
• Box 2
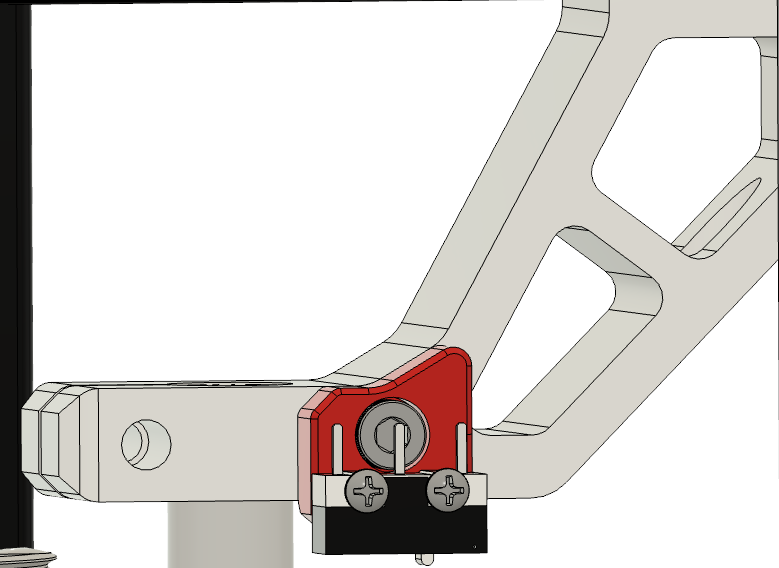 |
| Part | Location |
|---|---|
| M2 x 10mm Quantity: 2 |
Layer: 3 Box: VZ330 Box 6 |
| Endstop holder Quantitiy: 1 |
From step 1 |
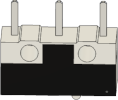
| Microswitch Quantity: 1 |
Box: VZ330 Box 2 |
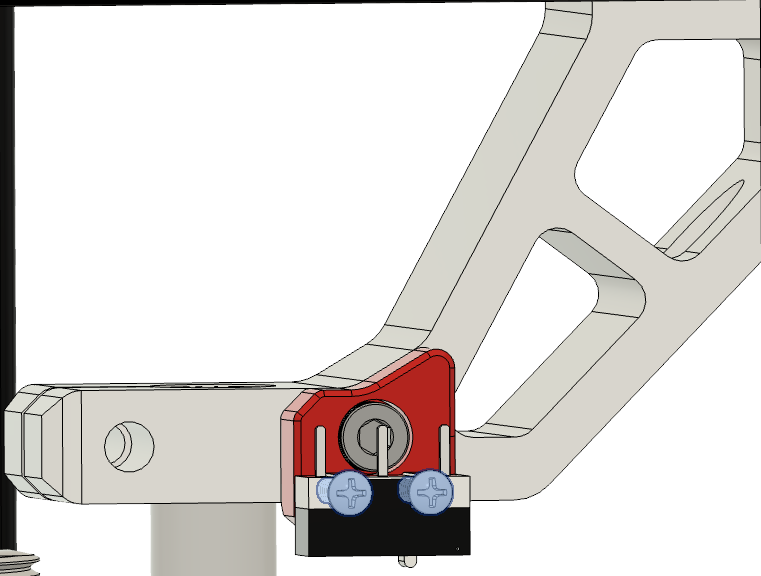 |
• The pin from the microswitch needs to point to the outerside of the frame • Mount the microswitch to the endstop with the two M2 x 10mm screws. |
Step 3
Required
• Box 6 - M3 x 45mm
• Box 6 - M3 nut
 |
| Part | Location |
|---|---|
| M3 x 45mm Quantity: 1 |
Layer: 3 Box: VZ330 Box 6 |
| M3 nut Quantitiy: 1 |
Layer: 3 Box: VZ330 Box 6 |
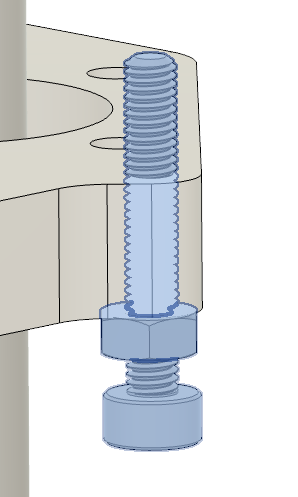 |
• Screw on the m3 nut to the M3 x 45mm screw • Screw in the nut screw combination to the front right of the bed support piece in the corresponding hole • The actual position of the screw will be aligned later in the build |
Step 4
Required
• Box 6 - M3 x 6mm
• Box 6 - M3 x 8mm
• Box 2
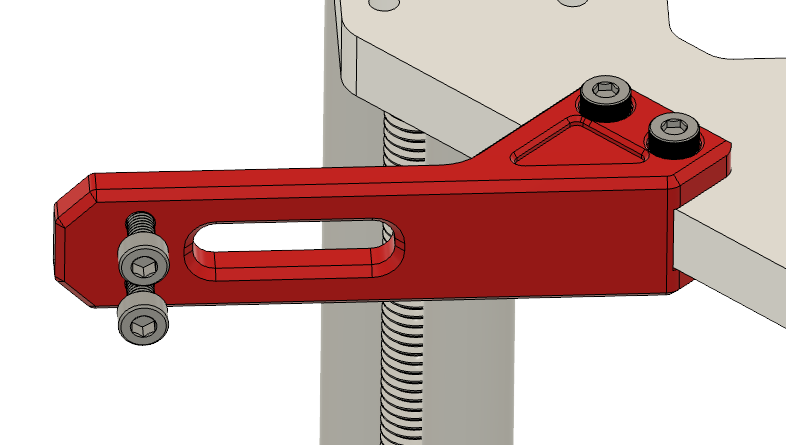 |
| Part | Location |
|---|---|
| M3 x 6mm Quantity: 2 |
Layer: 3 Box: VZ330 Box 6 |
| M3 x 8mm Quantity: 2 |
Layer: 3 Box: VZ330 Box 6 |
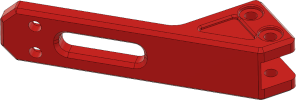
| Chain holder Quantity: 1 |
Layer: 2 Box: VZ330 Box 2 |
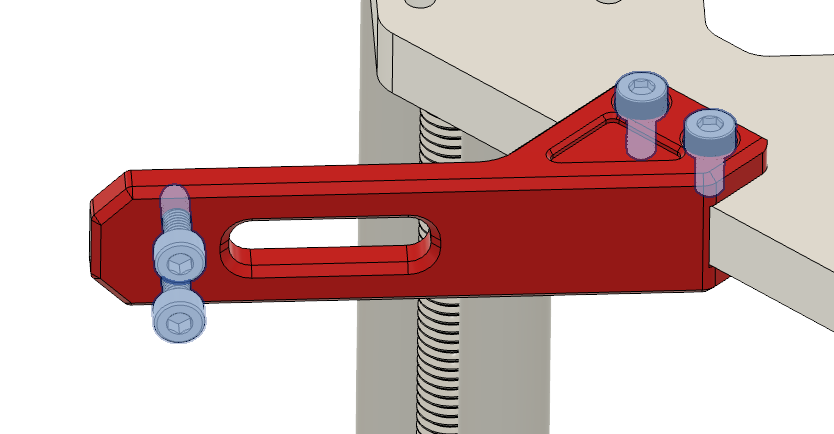 |
• Use the M3 x 6mm screws to attach the chain holder to the bed support • Put in the M3 x 8mm screws in the other two holes, with them we later attach the chain to the holder |
Step 5
Install chain […]
The bottom section gets attached with a bolt + T-nut on the bottom of the 2040 in the back.